How to create a new messenger ad
Overview :
Hey everyone, welcome to this exciting episode of BotPanels, Today we are going to talk about How to create a new messenger Ad within ChatBot.
Let’s have a look at what is messenger ad and how it works.

Messenger Ad:
Messenger Ad is a Facebook ad type by virtue of which users interact with your Facebook page when they click on the call to action button.
A big advantage of messenger ad is, you can send your ad traffic to messenger, where you can start chatting with potential users.
Create Messenger Ad:
Now we are going to create a new messenger ad within ChatBot. Click on the campaign link given in the top header. You will reach on to a new page.
You will see click to messenger ads link in the left navigation. Just click on it. In this workspace, you will get one another link that shows create click to messenger ads. When you click on it, you will reach on the messenger ad setup page.
Campaign Name:
We always recommend giving a meaningful name to your campaign. We name this Ad as Bot Messenger.
Select Options:
Now we need to fill out the entire necessary step given here. We will cover it up one by one. In the first step, we are going to select this second option as we are creating an Ad within ChatBot.
Then we need to select the ad account which is taken up by default if you have only one ad account with your Facebook page.
Now we give a name to our campaign. We will call it the Bot Campaign.
Budget:
If you want to set up a budget for your campaign, turn on campaign budget optimization. You can set up your daily spending from here. Click on next.
Pre-existing Ad:
Here you can select a pre-existing Ad set to make a clone of it or you can create a new ad set from scratch.
We give a new ad set name here as we call it Clone Ad Set.
Maximum Bid:
We leave this maximum Bid field as we have already optimized our budget in the previous section.
Start Date End Date:
We set our Ad start date and End date from here.
Ad Sets:
And this is the clone of our Ad set that we have designed for our previous campaigns.
Dialogues:
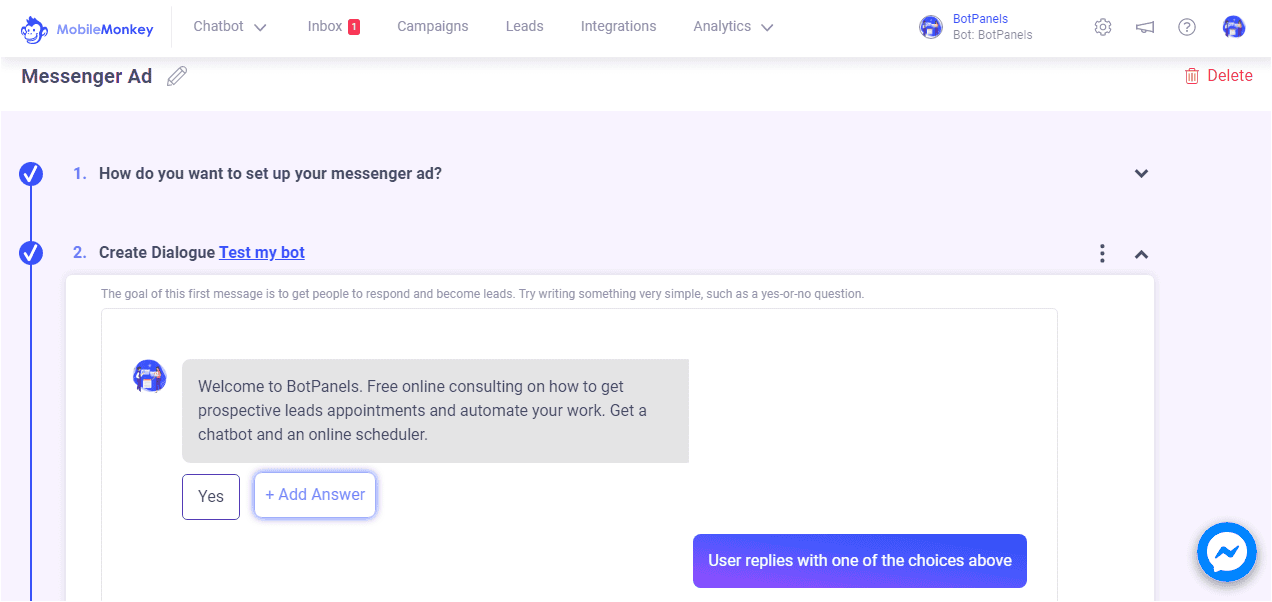
The next step is to create dialogues for your messenger ad.
A dialogue is a collection of messages that a chatbot will send to the user when the user clicks on the ad. If you do not know how to create a dialogue, we have a separate learning video on it.
Point to note here is, the first message in the dialogue cannot be deleted since it is an opt-in question as required by Facebook.
We can write our dialogue as, Thanks for your interest in our services.
What’s your email address, in case we get disconnected? The user replies with email and we will save the response in the email attribute.
Test My Bot:
We also have an option of Test my bot to cross-check the functionality of the bot before going live.
Once everything is done with the setup, click on Activate Ad to publish the ad to Facebook.
We will discuss some other interesting features of ChatBots in subsequent episodes of BotPanels. This episode on how to create a new messenger ad within ChatBot completes here.
You can subscribe to BotPanels to get access to interesting learning videos and free tutorials.
Feature
Feature
 Master AI tools like ChatGPT, Canva, Grammarly, vidIQ & tubebuddy.