How To Setup A Chat Bot Using Website Chat Widget
Overview :
Hey everyone, Welcome to a new exciting episode of BotPanels, Today we are going to talk about Website Chat Widget.
First of all, let’s have a look at what the website chat widget is. We have installed a website chat widget here on the website. We’ve got a little messenger icon here. If you click on it, it will show you an option to continue with your messenger ID.
There is one another new feature of guest login is coming up. That gives you the freedom to join the conversation as a guest without login id.
So as you see, if we click on it, it gets open up and the chatbot starts running its dialogues as we have written in the flow.
If you want to learn how to write chatbot dialogue, we have another episode on it.
The interesting point to note here is being on the messenger platform, this website chat widget runs perfectly on all platforms, whether it is desktop or mobile.
Now, we move ahead and see how you set this up.
Website Chat Widget: First click on chatbot and then click on its sub-menu Chat Starters. You will find an option of a Website chat widget here. Just click on it and you will land on this page. You will see a link here that shows the Create Website chat widget. Just click on it. You will reach on to a new page.
Name website chat widget: The very first thing that you need to do is to name your website chat widget otherwise it will show an untitled customer chat widget. It is a good practice to name your website chat widget because you might have multiple website chat widgets.
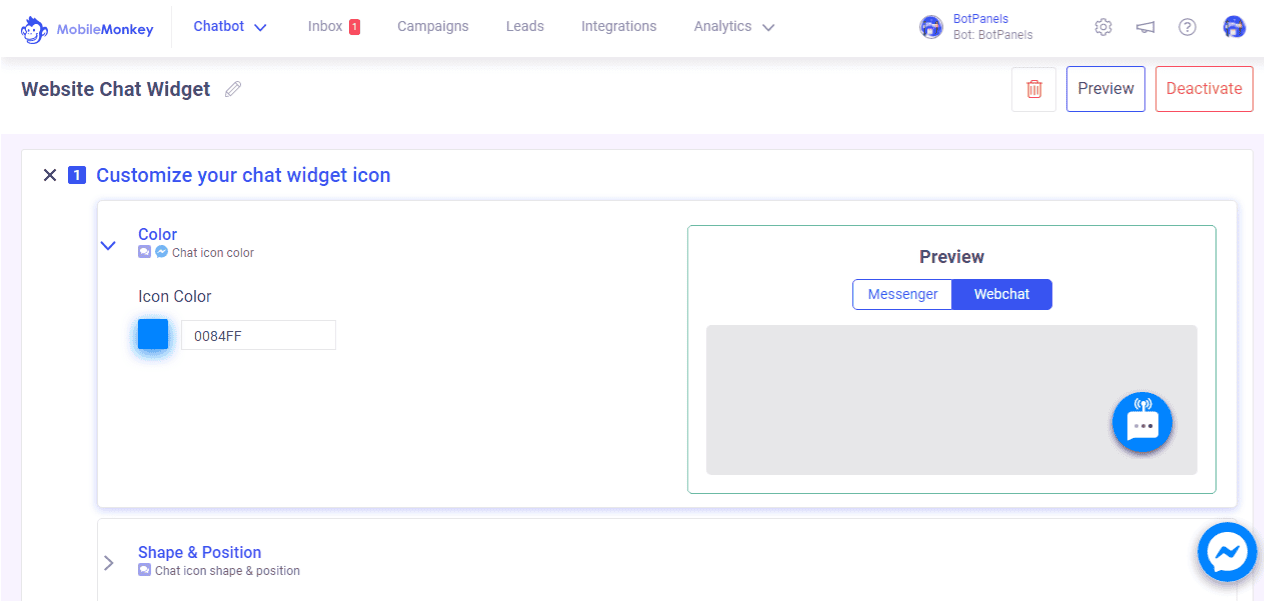
Customize: In the first step, you can customize your website chat widget icon compatible with the theme color of your website.
In the second step, you can edit the webchat greeting message. The default message is, Hello! How can I help you today?
You can also use the first message in dialogue as your greeting text. It is related to greeting behavior, where you can decide how you want to show it on desktop and mobile platforms.
Dialogue: The third step is choosing a dialogue for your website visitors. This is the dialogue that users will see when they click on a website chat widget.
We found a demo dialogue written here, hey there, can I get your email address in case we get disconnected.
You can change this dialogue or you can add some other dialogues as well. Click on the plus button and you can add dialogues using quick questions, text, or any other widget. If you don’t know how to add dialogues, see another episode on dialogues.
Placement: In step four you can choose when the chat icon will be displayed. If you just want to display it on mobile, uncheck the rest of the options. It is all up to you.
You can also put a condition to display the website chat widget only to certain pages. Select the condition from the current URL and then enter the URL in the given field here.
Install: Step five is the final step that has the instructions on how you install a customer chat widget on your website. You can select what type of website you are using up.
Then you can fill what is your website URL. You want to make sure that your domain is added here and get whitelisted. If you don’t add your domain, the website chat widget might not show appropriately on your website.
Once everything is done, It will give you this line of code. You can copy it and paste the code immediately after the head tag on every page you want it to appear. One important thing to remember, you just need to activate it from here.
Once you activate it, it will be ready to go live.
We will discuss some other interesting features of ChatBots in subsequent episodes of BotPanels. This episode on the Website chat widget completes here.
You can subscribe to BotPanels to get access to interesting learning videos and free tutorials.

Feature
Feature
 Master AI tools like ChatGPT, Canva, Grammarly, vidIQ & tubebuddy.